Easy Pickled Red Onions- Quick & Tangy Recipe
Pickled red onions are a true game-changer in the kitchen, aren’t they? I know for me, they’ve become an absolute staple. Think about it: that vibrant pop of fuchsia, that delightful crunch, and that perfect balance of sweet and tangy. It’s no wonder why these quick-pickled wonders have taken the culinary world by storm. They transform the humble onion into a culinary superhero, ready to elevate everything from tacos and salads to sandwiches and avocado toast. What makes pickled red onions so special is their incredible versatility and the sheer speed at which you can whip them up. In just a few minutes, you can create a condiment that adds a burst of flavor and visual appeal to any dish. Forget bland; it’s time for brilliance!
The Magic of Pickled Red Onions
Your New Favorite Kitchen Staple
Pickled Red Onions
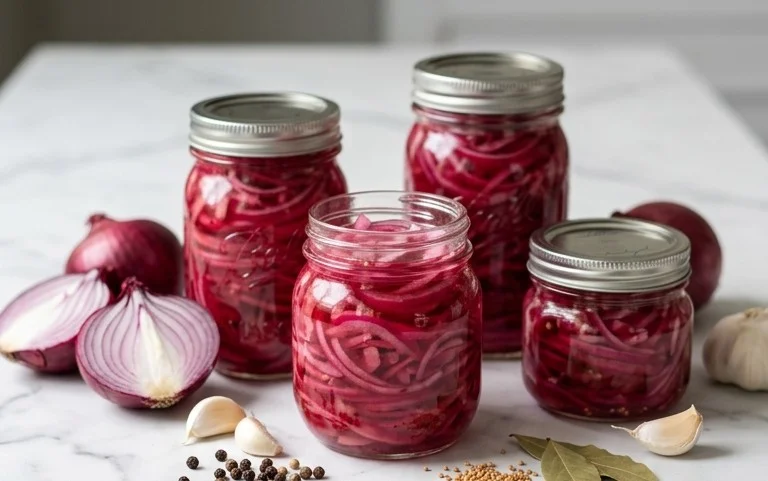
There’s something truly magical about pickled red onions. They transform a simple dish into something vibrant and exciting with their bright pink hue and a delightful tangy-sweet crunch. These aren’t just a garnish; they’re a flavor enhancer that can elevate everything from tacos and salads to burgers and sandwiches. I used to think pickling was complicated, but I’ve discovered it’s one of the easiest and most rewarding kitchen projects. It requires minimal effort and just a handful of pantry staples. The best part? You can whip up a batch of these beauties in under 30 minutes, and they’ll keep in the refrigerator for weeks, making them a fantastic go-to for adding a burst of flavor whenever you need it. Let’s get started on creating this versatile condiment!
Ingredients:
The Magic Behind the Flavor: Choosing Your Sugar
Before we dive into the steps, let’s chat about the sugar. I’ve listed “sugar (of choice)” because this is where you can really play with the flavor profile. Granulated white sugar is the standard and will give you a clean, sweet balance. However, if you want a richer, slightly more caramel note, you can opt for brown sugar. Just be aware that brown sugar can slightly alter the final color, making it a touch deeper. For a more robust, earthy sweetness, coconut sugar is another excellent option. My personal preference often leans towards granulated white sugar for its neutrality, allowing the tang of the vinegar and the natural sweetness of the onion to shine. Experiment with what you have on hand or what appeals to your palate!
Crafting Your Pickled Red Onions: Step-by-Step
1. Prepare the Onions: The first step is to get our red onions ready for pickling. You’ll want to peel them and then slice them thinly. A mandoline slicer is your best friend here if you have one – it ensures uniform thickness, which is key for even pickling. If you don’t have a mandoline, a sharp knife and a steady hand will do the trick. Aim for slices that are about 1/8 to 1/4 inch thick. You can slice them into rounds or half-moons, depending on your preference. Once sliced, I like to place them in a bowl and give them a gentle squeeze. This helps to soften them slightly and releases some of their potent juices, which can make them a little more palatable before they even hit the pickling liquid. Some people prefer to rinse them after squeezing, but I usually skip that step to retain as much onion flavor as possible.
2. Create the Brine: Now it’s time to make the flavorful pickling liquid, often called a brine. In a medium saucepan, combine the 1 1/4 cup of water and the 1 1/4 cup of white vinegar. Add your chosen 3 tablespoons of sugar and 1 tablespoon of sea salt. If you’re feeling a little adventurous and want a hint of heat, this is also the time to stir in your red pepper flakes. Start with 1/4 teaspoon if you’re unsure about spice, and you can always add more later. Place the saucepan over medium heat. We’re not looking to boil this mixture, but rather to bring it just to a simmer. Stir the ingredients gently as it heats up to ensure the sugar and salt dissolve completely. You’ll know it’s ready when you no longer see any granules of salt or sugar at the bottom of the pan.
3. Combine and Steep: Once your brine is hot and all the sugar and salt have dissolved, carefully remove the saucepan from the heat. Now, take your prepared, sliced red onions and place them into a heatproof jar or a sturdy glass container. I like to use Mason jars because they seal well and are perfect for storing the pickled onions in the refrigerator. Make sure the jar is clean and dry. Pour the hot brine over the onions, ensuring that they are completely submerged. You might need to gently press them down with a spoon or a clean utensil to make sure they all get a good soak in the liquid. The heat from the brine will begin extract to work its magic on the onions immediately, starting the pickling process.
4. Cooling and Infusing: This is where patience comes into play, but it’s a good kind of patience because the aroma filling your kitchen at this stage is incredible! Allow the jar of onions and brine to cool down on the counter. As it cools, you’ll notice the onions starting to soften and, most strikingly, their color will begin extract to deepen and transform into that gorgeous vibrant pink. This cooling process is crucial; it allows the flavors to meld and the onions to absorb the tangy sweetness of the brine without becoming mushy. I usually leave them on the counter for at least 30 minutes, or until they’ve reached room temperature. You can even give them a gentle shake once or twice during this cooling period to ensure even pickling.
5. Refrigerate and Enjoy: Once the onions have cooled to room temperature, it’s time to seal the jar and get them into the refrigerator. Screw on the lid tightly. While you can technically eat these pickled red onions immediately, I highly recommend waiting at least a few hours, or preferably overnight, for the flavors to fully develop. The longer they sit in the refrigerator, the more pronounced the tangy and sweet notes will become, and the more tender the onions will get. You’ll find that they transform from sharp and pungent to beautifully mellow and pickle-perfect. Store them in the refrigerator, and they will stay delightfully crisp and flavorful for up to two to three weeks. They are incredibly versatile – add them to avocado toast, top your favorite salads, or use them to cut through the richness of a hearty burger. Enjoy your homemade pop of color and flavor!
Conclusion:
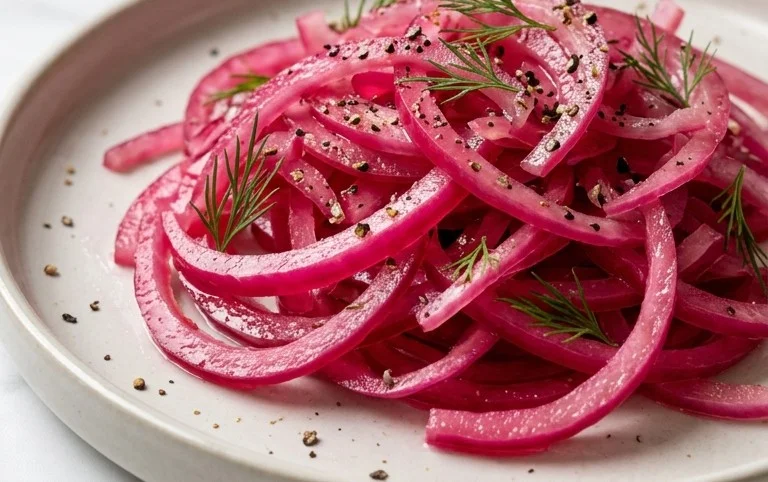
And there you have it – your guide to making these vibrant, tangy, and utterly delicious pickled red onions! This recipe is fantastic because it’s incredibly simple to make, requiring just a handful of common ingredients and minimal active time. The result is a versatile condiment that can elevate almost any dish. From adding a punchy flavor to tacos and sandwiches to bringin extractg a bright contrast to salads and roasted vegetables, pickled red onions are a true game-changer in the kitchen. I encourage you to give this easy recipe a try; you’ll be amazed at how frequently you reach for this jar!
Feel free to get creative with your pickled red onions! You can experiment with different vinegars – apple cider vinegar or white grape juice vinegar both work beautifully. A pinch of sugar can be added for a touch of sweetness, or you might consider adding a few peppercorns or a bay leaf to the brine for extra aromatic complexity. The possibilities are endless, and the payoff is a pantry staple that’s far superior to anything store-bought.
Frequently Asked Questions:
How long do pickled red onions last?
When stored in an airtight container in the refrigerator, these pickled red onions will stay fresh and delicious for at least 2 to 3 weeks. The longer they sit, the more the flavors will meld and intensify, so don’t be afraid to let them mature a bit before diving in!
Can I use different types of onions?
While red onions are ideal for their vibrant color and slightly sweeter flavor when pickled, you can certainly experiment with other onions. White or yellow onions will also pickle well, though they won’t have the same striking visual appeal. The texture and tang will be similar, but red onions truly shine in this application.
What are some other serving suggestions for pickled red onions?
Beyond the classics, try adding them to avocado toast, scrambled eggs, charcuterie boards, or even a simple bowl of hummus. They are also a delightful topping for burgers, grilled fish, and pulled beef. Their versatility is truly one of the best parts of having homemade pickled red onions on hand!
Pickled Red Onions
Quick and easy pickled red onions, perfect for adding a tangy, vibrant flavor to tacos, salads, sandwiches, and more. This recipe is versatile and can be adjusted to your spice preference.
Ingredients
-
2 medium red onions (or 3 small ones)
-
1 1/4 cup water
-
1 1/4 cup white vinegar
-
3 tbsp sugar (of choice)
-
1 tbsp sea salt
-
1/4-1/2 tsp red pepper flakes (optional)
Instructions
-
Step 1
Thinly slice the red onions. You can use a mandoline for uniform slices, or a sharp knife. -
Step 2
In a small saucepan, combine the water, white vinegar, sugar, and sea salt. Heat over medium heat, stirring until the sugar and salt are completely dissolved. Do not boil. -
Step 3
If using, stir in the red pepper flakes into the brine. -
Step 4
Place the sliced onions into a heatproof jar or container. Pour the warm brine over the onions, ensuring they are fully submerged. -
Step 5
Let the mixture cool to room temperature, then cover and refrigerate. The onions will be ready to eat after about 30 minutes, but are best after at least a few hours or overnight.
Important Information
Nutrition Facts (Per Serving)
It is important to consider this information as approximate and not to use it as definitive health advice.
Allergy Information
Please check ingredients for potential allergens and consult a health professional if in doubt.