Boston Cream Poke Cake Recipe- Easy & Delicious Dessert
Boston Cream Poke Cake is the ultimate dessert mashup, a delightful fusion of two beloved classics that promises pure indulgence. Imagin extracte the decadent richness of Boston Cream Pie, with its luscious pastry cream and glossy chocolate ganache, transformed into an incredibly moist and impossibly easy poke cake. That’s the magic of this Boston Cream Poke Cake! It’s a dish that brings smiles to faces and gathers everyone around the table, not just for its irresistible flavor but also for its fun, surprise-filled center. What makes this particular treat so special? It’s the clever technique of poking holes into a tender cake, allowing a creamy, dreamy filling to seep through, creating pockets of pure joy in every single bite. It’s a showstopper that’s surprisingly simple to create, making it perfect for any occasion, from casual get-togethers to celebratory feasts.
Get ready to fall in love.
This Boston Cream Poke Cake is about to become your new go-to.
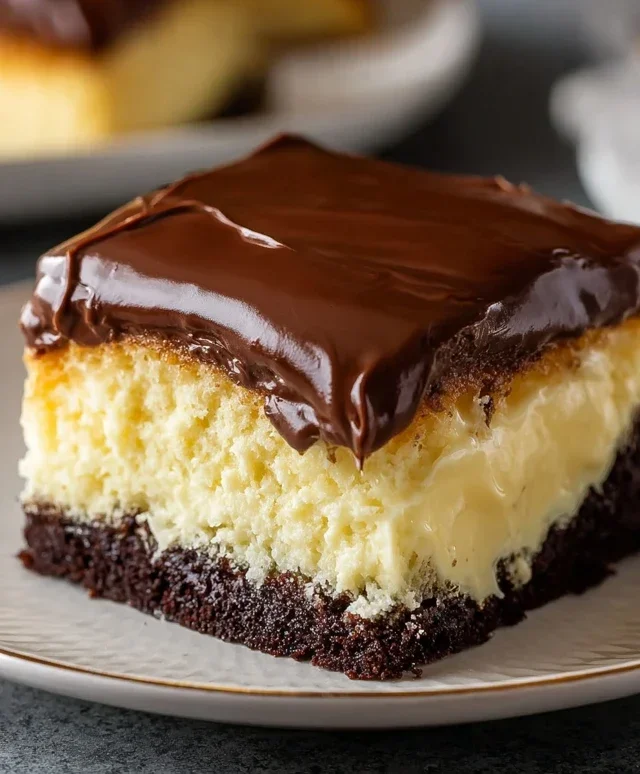
Boston Cream Poke Cake
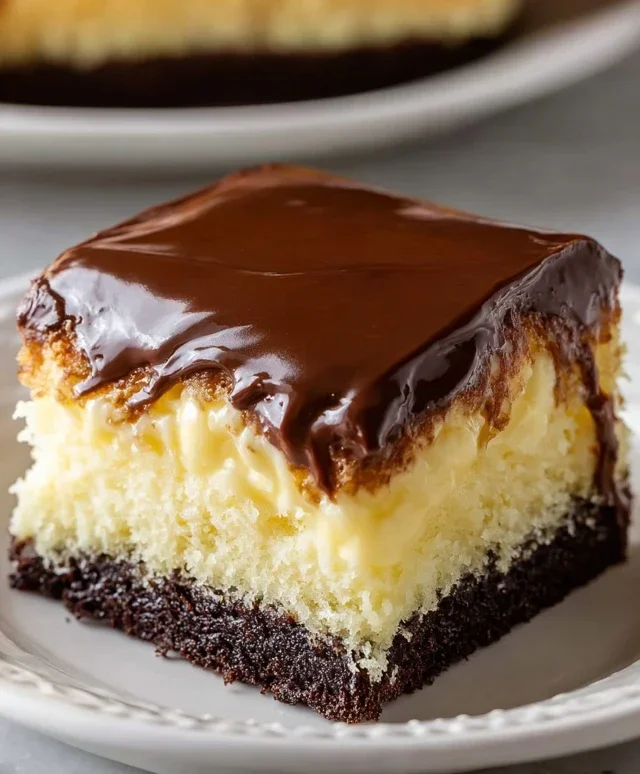
Get ready to impress your friends and family with this incredibly easy and utterly delicious Boston Cream Poke Cake. This dessert takes all the best parts of a classic Boston Cream Pie – the fluffy cake, the creamy pudding, and the rich chocolate topping – and transforms them into a fun, foolproof poke cake experience. It’s the perfect make-ahead dessert for parties, potlucks, or simply when you’re craving a sweet treat that tastes like pure indulgence without all the fuss. The magic of a poke cake lies in its ability to soak up all the luscious pudding, creating moist pockets of flavor in every single bite. Trust me, this recipe is a guaranteed crowd-pleaser!
Ingredients:
Instructions:
Let’s get started on creating this delightful dessert!
Phase 1: Baking the Cake
First things first, we need to get our cake base ready. Preheat your oven according to the instructions on your yellow cake mix box. While the oven is preheating, prepare your baking pan. I usually opt for a 9×13 inch baking dish for this recipe, but you can also use a 9×9 inch square pan for a slightly thicker cake if you prefer. Grease and flour your chosen pan thoroughly, or use baking spray to ensure your cake doesn’t stick.
Now, prepare the cake batter according to the package directions. This will typically involve combining the cake mix with eggs, oil, and water. Mix everything together until just combined and smooth. Be careful not to overmix the batter, as this can result in a tough cake. Pour the batter evenly into your prepared baking pan and spread it out with a spatula. Place the pan in the preheated oven and bake for the time recommended on the cake mix box, or until a toothpick inserted into the center comes out clean. Once baked, remove the cake from the oven and let it cool in the pan on a wire rack. We want it to cool down enough so that it’s not piping hot when we start poking, but it doesn’t need to be completely cold.
Phase 2: Creating the Pudding Pockets
This is where the “poke” part of the poke cake comes into play, and it’s the secret to its incredible moistness. While the cake is cooling, it’s time to whip up our pudding. In a large bowl, combine the two boxes of instant vanilla or French vanilla pudding with the 4 cups of milk. Whisk them together vigorously. You’ll want to whisk continuously for about 2 minutes, or until the pudding starts to thicken. It’s important to use instant pudding here, as it sets up quickly and doesn’t require cooking. If you prefer a stronger vanilla flavor, feel free to use French vanilla pudding – it adds a lovely depth. As the pudding thickens, you’ll notice it becomes quite dense. This is exactly what we want! Set this pudding aside for now.
Now, let’s return to our slightly cooled cake. Grab a wooden skewer, the handle of a wooden spoon, or even a fork. The goal is to poke holes all over the surface of the cake. Don’t be shy! Make your holes about 1 inch apart, ensuring they go all the way down to the bottom of the cake. The more holes you make, the more pudding your cake will absorb, leading to an even more luscious and flavorful result. Gently wiggle the skewer or spoon handle as you poke to create slightly larger openings that will hold more pudding. Take your time with this step and try to cover the entire surface of the cake evenly.
Once your cake is thoroughly “poked,” it’s time to introduce the creamy goodness. Pour the thickened vanilla pudding evenly over the top of the cake, making sure to get as much of it as possible into the holes you’ve created. Use a spatula to gently spread it out across the entire surface, ensuring a good coating. Don’t worry if some pudding pools on top; that’s part of the charm. The pudding will continue to seep down into the cake, creating those irresistible moist pockets.
Phase 3: The Chocolatey Crown
Now for the finishing touch that makes this a true Boston Cream experience – the chocolate frosting! Place your cake, now covered in pudding, into the refrigerator. We need it to chill for at least 2-3 hours, or preferably until it’s fully set. This chilling time is crucial for allowing the pudding to fully set and to further meld with the cake. The longer it chills, the more the flavors will develop and the easier it will be to frost.
Once the cake is nicely chilled and the pudding has set firm, it’s time to add the chocolate frosting. Take the 16-ounce tub of chocolate frosting and remove the lid. You can gently warm the frosting slightly if it’s very firm, making it easier to spread. I sometimes pop mine in the microwave for 10-15 seconds, stirring well, but be careful not to overheat it. Using an offset spatula or a butter knife, spread the chocolate frosting evenly over the top of the chilled pudding layer. Aim for a smooth, even coating. You can make it as fancy or as simple as you like! If you want to get really decadent, you can even reserve a little bit of pudding to pipe decorative swirls on top of the chocolate, or sprinkle some chocolate shavings.
For the best flavor and texture, I highly recommend letting the finished cake chill in the refrigerator for at least another hour before serving. This allows the chocolate frosting to firm up slightly and ensures the entire cake is beautifully cohesive. When you’re ready to serve, slice into this masterpiece and watch your guests’ eyes light up. Enjoy every creamy, chocolaty, cakey bite!
Conclusion:
There you have it – the ultimate guide to creating a show-stopping Boston Cream Poke Cake! This recipe is an absolute winner because it combines all the beloved flavors of a classic Boston Cream Pie with the effortless fun of a poke cake. The moist cake, luscious pudding filling, and rich chocolate ganache create a symphony of textures and tastes that will have everyone beggin extractg for seconds. It’s surprisingly simple to make, making it perfect for both begin extractner bakers and seasoned pros looking for a reliable crowd-pleaser. I love serving this dessert chilled, allowing the flavors to meld beautifully. For an extra touch, consider adding some fresh berries or a dollop of whipped cream on top. Don’t be afraid to get creative with variations! You could try using a chocolate cake mix for an even deeper chocolate flavor, or experiment with different pudding flavors like butterscotch. The possibilities are endless! I truly encourage you to give this Boston Cream Poke Cake a try. It’s a delightful treat that’s sure to become a favorite in your dessert repertoire.
Frequently Asked Questions:
Why is it called a “poke” cake?
It’s called a poke cake because you “poke” holes into the baked cake using the handle of a wooden spoon or a fork. This creates pathways for the liquid filling, like pudding or sweetened condensed milk, to soak into the cake, making it incredibly moist and flavorful.
Can I make this Boston Cream Poke Cake ahead of time?
Absolutely! In fact, I find it’s even better when made a few hours or even a day in advance. This allows ample time for the pudding to fully penetrate the cake and for the flavors to meld together. Just be sure to cover it tightly and refrigerate it until you’re ready to serve.
What’s the best way to store leftover poke cake?
Leftover Boston Cream Poke Cake should be stored in an airtight container in the refrigerator. Due to the pudding and cream components, it needs to be kept cold to maintain its freshness and prevent spoilage. It will typically stay delicious for about 3-4 days when stored properly.
Boston Cream Poke Cake
A decadent poke cake inspired by the classic Boston Cream Pie, featuring a moist yellow cake soaked in vanilla pudding and topped with rich chocolate frosting.
Ingredients
-
15.25 ounce box yellow cake mix
-
Eggs
-
Oil
-
Water
-
2 (3.4 ounce) boxes instant vanilla pudding
-
4 cups milk
-
16 ounce tub chocolate frosting
Instructions
-
Step 1
Prepare yellow cake mix according to package directions, using eggs, oil, and water. Bake in a 9×13 inch pan until a toothpick inserted into the center comes out clean. -
Step 2
While the cake is still warm, poke holes all over the top using the handle of a wooden spoon or a fork. -
Step 3
In a separate bowl, whisk together the instant vanilla pudding mixes and milk until smooth and thickened. Pour the pudding evenly over the warm, poked cake, ensuring it fills the holes. -
Step 4
Chill the cake in the refrigerator for at least 2 hours, or until the pudding is completely set. -
Step 5
Once the pudding is set, warm the chocolate frosting slightly (if needed for easier spreading) and spread it evenly over the top of the chilled cake. -
Step 6
Refrigerate the cake for at least 30 minutes more before slicing and serving.
Important Information
Nutrition Facts (Per Serving)
It is important to consider this information as approximate and not to use it as definitive health advice.
Allergy Information
Please check ingredients for potential allergens and consult a health professional if in doubt.