Easy Oreo Cake Balls-Decadent Dessert Bites
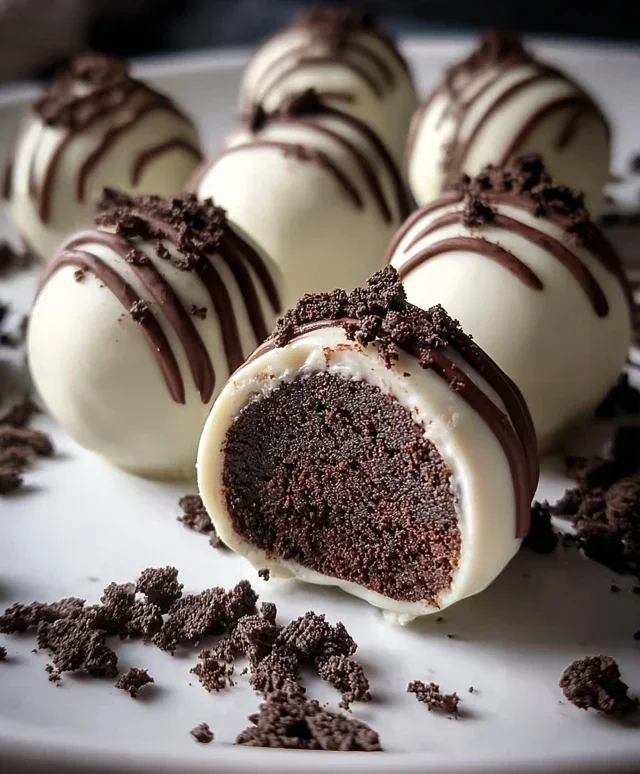
Oreo cake balls are an absolute showstopper, and for good reason! If you’re looking for a treat that’s as fun to make as it is to devour, you’ve landed in the perfect spot. We all know and love the classic chocolatey crunch of an Oreo, but imagin extracte that iconic flavor transformed into a bite-sized, impossibly decadent indulgence. That’s precisely the magic of Oreo cake balls. They’re a delightful fusion of moist, rich cake and creamy frosting, all enrobed in a luscious chocolate shell. What makes them truly special is their versatility; they’re perfect for parties, a sweet afternoon pick-me-up, or even as a thoughtful homemade gift. Get ready to fall head over heels for these delightful little treasures that are sure to disappear in a flash!
Oreo Cake Balls: The Ultimate No-Bake Treat!
Get ready to impress your friends and family (or just treat yourself!) with these incredibly delicious and surprisingly easy Oreo Cake Balls. They’re the perfect bite-sized indulgence, combining the irresistible crunch of Oreos with a creamy, decadent center, all enrobed in smooth, melted candy coating. The best part? No oven required! These are a fantastic option for parties, holidays, or anytime you need a sweet pick-me-up. I’ve been making these for years, and they are always a huge hit. The combination of textures and flavors is simply divine.
Ingredients:
Instructions:
Prepare the Oreo Crum extractble:
The first step to creating these delightful Oreo Cake Balls is to get our Oreo crum extractble ready. You’ll want to take your 24 regular-sized Oreo cookies and crush them into fine crum extractbs. The easiest way to do this is by using a food processor. Simply toss all the cookies into the food processor and pulse until you have a fine, uniform crum extractb. If you don’t have a food processor, you can place the Oreos in a sturdy zip-top bag and use a rolling pin or a heavy can to crush them. Be thorough – you don’t want any large chunks of cookie left.
Combine with Cream Cheese:
Now, it’s time to introduce our creamy binder! In a medium mixing bowl, add the 4 ounces of softened cream cheese. Make sure your cream cheese is truly softened; this will make it much easier to incorporate evenly. Add the finely crushed Oreo crum extractbs to the bowl with the cream cheese. Using a sturdy spatula or your hands (which are often the best tools for this job!), mix the cream cheese and Oreo crum extractbs together until they are thoroughly combined. The mixture should form a cohesive dough that you can easily roll into balls. If the mixture seems a bit dry and crum extractbly, you can add another teaspoon of softened cream cheese. Conversely, if it seems too wet, add a few more Oreo crum extractbs. The consistency should be like a thick cookie dough that holds its shape when pressed.
Shape and Chill the Cake Balls:
Once you have your well-combined Oreo and cream cheese mixture, it’s time to shape our cake balls. Take small portions of the mixture, about one tablespoon each, and roll them between your palms to form uniform balls. Aim for consistency in size so that they all bake (or rather, set) evenly and look appealing when finished. Don’t make them too large; these are meant to be bite-sized. As you form the balls, place them on a baking sheet lined with parchment paper or wax paper. Once all the mixture has been rolled into balls, place the baking sheet in the refrigerator for at least 30 minutes. This chilling step is crucial. It helps the cake balls firm up, making them much easier to dip in the candy melts and preventing them from falling apart.
Melt and Prepare the Candy Coating:
While your Oreo balls are chilling, let’s get our coating ready. In a microwave-safe bowl, add the 10 ounces of white candy melts. If you’re using Ghirardelli brand, you’ll find they melt beautifully and have a fantastic flavor. Microwave the candy melts in 30-second intervals, stirring well after each interval. Be patient and avoid overheating, as this can cause the candy melts to seize up and become unusable. Once the candy melts are mostly smooth with just a few small unmelted pieces remaining, remove the bowl from the microwave and stir until completely smooth. If you find the candy coating is too thick to dip your cake balls into smoothly, you can add the optional 2 tablespoons of heavy cream. Stir this in gradually until the coating reaches a smooth, pourable consistency. It should be thick enough to coat the balls but thin enough to drip off easily. You can also melt the candy melts using a double boiler if you prefer.
Dip and Decorate Your Oreo Cake Balls:
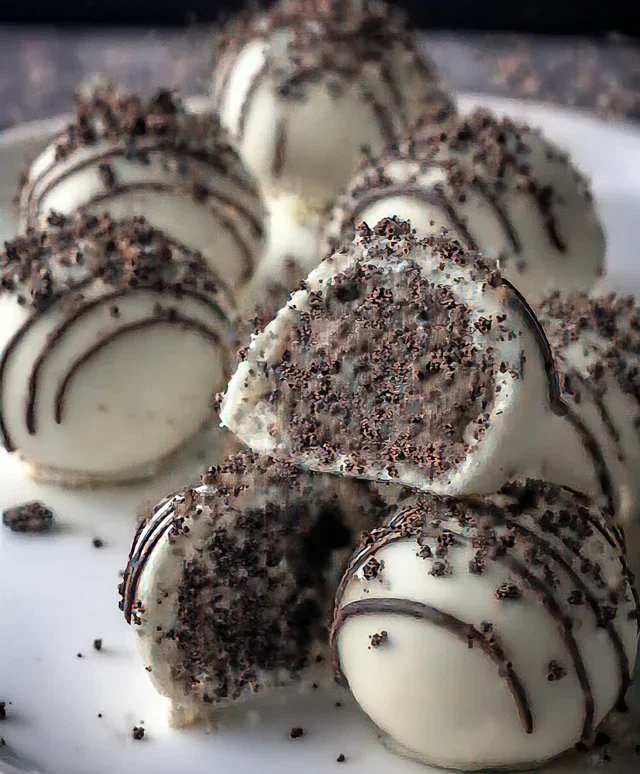
This is where the magic happens! Take your chilled Oreo cake balls out of the refrigerator. Using a fork or a candy dipping tool, carefully dip each cake ball into the melted white candy coating, ensuring it’s fully submerged. Let any excess coating drip back into the bowl. Place the coated cake ball back onto the parchment-lined baking sheet. Immediately after dipping, while the coating is still wet, you have a few options for decoration. For the crushed Oreo sprinkling, sprinkle the crushed Oreo cookies generously over the wet coating. This adds an extra layer of Oreo flavor and a lovely texture. For the semi-sweet chocolate drizzle, melt a small amount of semi-sweet chocolate chips (you can do this in the microwave in short intervals as well, or in a small saucepan over low heat). Once melted and smooth, transfer the melted chocolate to a piping bag with a small tip, or a zip-top bag with a tiny corner snipped off. Drizzle the semi-sweet chocolate over the white-coated cake balls in a decorative pattern. You can also add sprinkles, edible glitter, or other fun toppings at this stage. Once decorated, allow the Oreo Cake Balls to set completely at room temperature, or for a quicker set, you can pop them back into the refrigerator for about 10-15 minutes. Once set, they are ready to be enjoyed!
Conclusion:
And there you have it – a foolproof guide to creating these irresistible Oreo Cake Balls! I truly hope you’re as excited to make them as I am to eat them. This recipe is a winner because it’s incredibly easy, surprisingly versatile, and guarantees a crowd-pleasing treat. Whether you’re a seasoned baker or a complete novice, these delightful little bites are sure to impress. The combination of creamy frosting and crushed Oreos is simply divine, offering a burst of chocolatey goodness in every mouthful.
They are perfect for parties, bake snon-alcoholic ales, or just a delightful afternoon indulgence. Feel free to get creative with your decorations! A simple drizzle of melted chocolate, a sprinkle of edible glitter, or even some festive sprinkles can elevate them to the next level. For even more fun, consider adding a hint of peppermint extract to your cream cheese frosting or folding in some mini chocolate chips for an extra chocolatey punch. I encourage you to give this Oreo Cake Balls recipe a try – you won’t be disappointed!
Frequently Asked Questions:
Can I make Oreo Cake Balls ahead of time?
Absolutely! Oreo Cake Balls can be made up to 3-4 days in advance. Store them in an airtight container in the refrigerator to maintain their freshness and prevent them from drying out. It’s best to let them come to room temperature for about 15-20 minutes before serving for the best texture.
What’s the best way to store leftover Oreo Cake Balls?
For optimal freshness, store any leftover Oreo Cake Balls in an airtight container. If you’ve dipped them in chocolate, they can be stored at room temperature if your environment isn’t too warm. However, for longer storage or if your kitchen tends to be warm, refrigerating them in an airtight container is recommended. Just remember to let them soften slightly before enjoying them again!
Can I use different types of Oreos for this recipe?
Yes, you absolutely can! While classic Oreos are fantastic, feel free to experiment with other flavors like Golden Oreos, Double Stuf Oreos, or even seasonal varieties. The possibilities are endless, and each variation will offer a unique twist to your delicious Oreo Cake Balls.
Oreo Cake Balls
Decadent and easy-to-make Oreo cake balls, perfect for parties and celebrations. These no-bake treats feature a creamy Oreo filling coated in sweet white chocolate.
Ingredients
-
24 Oreo cookies (regular size, about one standard package)
-
4 oz cream cheese, softened
-
10 oz white candy melts (Ghirardelli brand recommended)
-
2 tablespoons heavy cream (optional, only if needed to thin candy coating)
-
Crushed Oreo cookies for sprinkling
-
Semi-sweet chocolate chips for drizzling
Instructions
-
Step 1
Crush the Oreo cookies into fine crumbs using a food processor or by placing them in a resealable bag and crushing with a rolling pin. -
Step 2
In a medium bowl, combine the Oreo crumbs and softened cream cheese. Mix until well combined and a dough-like consistency forms. -
Step 3
Roll the mixture into small balls, about 1-inch in diameter. Place them on a baking sheet lined with parchment paper. -
Step 4
Melt the white candy melts according to package directions. If the coating is too thick, stir in heavy cream, one tablespoon at a time, until desired consistency is reached. -
Step 5
Dip each Oreo ball into the melted white chocolate, ensuring it is fully coated. Tap off any excess chocolate and return to the parchment-lined baking sheet. -
Step 6
While the coating is still wet, sprinkle with crushed Oreo cookies. -
Step 7
Melt the semi-sweet chocolate chips. Drizzle over the coated Oreo balls once the white chocolate has set. -
Step 8
Allow the Oreo cake balls to set completely in the refrigerator before serving.
Important Information
Nutrition Facts (Per Serving)
It is important to consider this information as approximate and not to use it as definitive health advice.
Allergy Information
Please check ingredients for potential allergens and consult a health professional if in doubt.