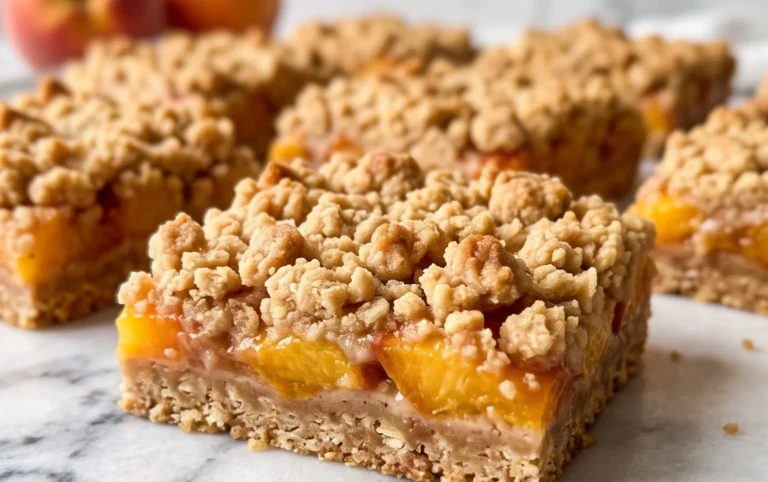
Easy Peach Hand Pies Deliciously Sweet Summer Treat
Peach hand pies are the ultimate portable taste of summer, and I’m so excited to share this recipe with you! There’s something undeniably charming about a perfectly formed pocket of flaky pastry bursting with sweet, juicy peaches. These aren’t just any dessert; they’re a nostalgic hug in edible form. Why do we love them so much? Perhaps it’s the convenience – no forks required, just pure handheld bliss. Or maybe it’s the way the warm, caramelized peach filling spills out with every bite, a delightful mess that’s totally worth it. What truly sets these peach hand pies apart is the balance: the tender, slightly tart fruit perfectly complemented by a buttery, golden crust. They’re ideal for picnics, a sweet treat with your afternoon coffee, or even a delightful dessert to share (or keep all to yourself – no judgment here!). Let’s dive in and create some magic!

Peach Hand Pies
There’s something incredibly charming about a hand pie. It’s a perfectly portioned, portable pocket of pure deliciousness, and when it’s filled with sweet, juicy peaches, it’s simply irresistible. These peach hand pies are surprisingly easy to whip up, making them a fantastic treat for a casual picnic, a bake snon-alcoholic ale, or just an afternoon pick-me-up. Forget complicated pastry dough; we’re using convenient refrigerated pie crusts to make this process a breeze. The result is a golden-brown, crispy exterior giving way to a warm, gooey peach filling that sings of summer.
Ingredients:
Getting Started: Preparing Your Dough and Filling
The beauty of these hand pies lies in their simplicity. We’re going to start by getting our workspace ready and our ingredients prepped.
First things first, let’s get our peach filling ready. Open your 21 oz. can of peach pie filling and give it a gentle stir. Sometimes the fruit can settle, so a quick mix ensures you have an even distribution of peaches and that lovely, thick sauce throughout. If your peaches are in very large chunks, you can gently break them up with your spoon to make them more manageable for the hand pies. You don’t want giant pieces that will prevent the pies from sealing properly.
Next, we need to prepare our pie crusts. Carefully unroll your two refrigerated pie crusts onto a lightly floured surface. It’s important to work relatively quickly with refrigerated dough, as it can become sticky if it warms up too much. Use a round cookie cutter or a small bowl to cut out circles from each pie crust. A good size to aim for is about 4 to 5 inches in diameter. You’ll want to get as many circles as possible from each crust. Don’t worry about perfectly neat edges; rustic charm is part of the appeal of hand pies! Gather up any scraps, gently re-roll them, and cut out more circles until you’ve used up as much dough as possible.
Assembling Your Delicious Hand Pies
Now for the fun part – assembling these little flavor bombs!
1. Filling the Pies: Take one of your prepared dough circles and place it on a clean, dry surface. Spoon about 2 to 3 tablespoons of the peach pie filling onto one half of the dough circle, leaving a ½-inch border all around. Be careful not to overfill, as this can make it difficult to seal the pies and can cause the filling to leak out during frying. If you’re using a spoon that tends to drip a lot of syrup, try to drain off a little bit of the excess before spooning it onto the dough.
2. Sealing the Edges: This is a crucial step for ensuring your filling stays tucked away. Lightly moisten the exposed ½-inch border of the dough with a little bit of water. You can use your finger or a pastry brush for this. Now, carefully fold the other half of the dough circle over the filling to create a half-moon shape. Gently press the edges together to seal them. For an extra secure seal and a decorative finish, you can use the tines of a fork to crimp the edges. Press down firmly with the fork all along the curved edge. This not only looks nice but also helps prevent any of that delicious peach filling from escaping during the frying process.
3. Creating Vent Holes: Before we fry these beauties, we need to give them somewhere to breathe! Using the tip of a sharp knife, carefully cut a few small slits or vents in the top of each hand pie. These vents allow steam to escape as the pies cook, preventing them from puffing up too much and bursting. Two or three small slits should be sufficient. Again, don’t worry about perfection; these are meant to be charmingly homemade.
4. Frying to Golden Perfection: Now it’s time to get that lovely crispy crust. Pour enough vegetable oil into a heavy-bottomed skillet or Dutch oven to come up about 1 to 1 ½ inches. Heat the oil over medium heat until it reaches about 350°F (175°C). You can test the oil by dropping a tiny piece of pie crust into it; if it sizzles and floats to the surface immediately, the oil is ready. Carefully place 2-3 hand pies into the hot oil, being careful not to overcrowd the pan. Overcrowding will lower the oil temperature and result in greasy, less-than-crispy pies.
5. Achieving the Golden Hue: Fry the hand pies for about 2-3 minutes per side, or until they are a beautiful golden brown. Use a slotted spoon or a spider strainer to carefully flip them over so they cook evenly on both sides. Once they’re a gorgeous golden color, carefully remove them from the oil and place them on a wire rack set over a baking sheet or paper towels to drain any excess oil. This wire rack step is important for allowing air to circulate and keep the bottoms from becoming soggy. Continue frying the remaining hand pies in batches, ensuring the oil temperature is maintained between batches.
The Finishing Touch: A Sweet Glaze
To elevate these already delightful treats, we’re going to add a simple, sweet glaze.
In a small bowl, whisk together the 1/2 cup of powdered sugar, 1 teaspoon of corn syrup, and 1 tablespoon of water until you have a smooth, pourable glaze. The corn syrup will give the glaze a lovely shine and a slightly chewy texture, preventing it from being too brittle.
Once the hand pies have cooled slightly, drizzle this glaze generously over the tops. The warmth of the pies will help the glaze set just a bit.
And there you have it – delicious, homemade peach hand pies ready to be devoured! They are best enjoyed warm, but they are also wonderful at room temperature. Enjoy the taste of summer in every bite!

Conclusion:
And there you have it – your guide to creating the most delightful Peach Hand Pies! This recipe is truly wonderful because it strikes a perfect balance: a flaky, buttery crust encasing a sweet, juicy peach filling that tastes like pure summer sunshine. These individual pies are incredibly satisfying to make and even more so to eat. They’re portable, fuss-free, and make for a charming dessert or a special breakfast treat. I truly encourage you to give these Peach Hand Pies a try; you won’t regret it!
To serve, I love them warm, perhaps with a dollop of vanilla ice cream or a drizzle of caramel sauce. For variations, don’t be afraid to get creative! You can add a pinch of cinnamon or nutmeg to the peach filling, a sprinkle of cardamom for an exotic twist, or even mix in a few blueberries for a delightful fruity combination. If peaches are out of season, don’t worry; a mix of berries or even thinly sliced apples would work beautifully. I hope you enjoy making and sharing these delicious hand pies!
Frequently Asked Questions:
Can I make the dough ahead of time?
Absolutely! The pie dough can be made up to 2 days in advance and stored in the refrigerator. Just be sure to wrap it tightly in plastic wrap. You can also freeze the dough for up to a month, thawing it in the refrigerator overnight before use.
What if I don’t have fresh peaches?
No problem! You can easily substitute with frozen or canned peaches. If using frozen, make sure to thaw them completely and drain off any excess liquid before adding them to the filling. If using canned, opt for those packed in juice rather than syrup and drain them very well.
Peach Hand Pies
Delicious and easy-to-make peach hand pies, perfect for a sweet treat. Uses convenient canned pie filling and refrigerated crust for a quick preparation.
Ingredients
-
21 oz. can peach pie filling
-
Refrigerated pie crust
-
1/2 cup powdered sugar
-
1 teaspoon corn syrup
-
1 tablespoon water
-
Vegetable oil for frying
Instructions
-
Step 1
Prepare the peach filling. If using whole peaches, dice them and mix with sugar, cornstarch, cinnamon, and a splash of lemon juice. For canned filling, you can use it as-is or mash it slightly for a smoother texture. -
Step 2
Unroll the refrigerated pie crusts and cut out circles using a cookie cutter or a small bowl as a guide. You should get about 6-8 circles per crust. -
Step 3
Spoon about 2 tablespoons of peach filling onto one half of each pie crust circle, leaving a border around the edge. -
Step 4
Moisten the edges of the pie crust with a little water and fold the other half over the filling to create a half-moon shape. Crimp the edges with a fork to seal. -
Step 5
Cut small slits in the top of each hand pie to allow steam to escape during frying. -
Step 6
Heat vegetable oil in a skillet over medium heat. Carefully place the hand pies into the hot oil, frying for about 2-3 minutes per side, or until golden brown and puffed. -
Step 7
Remove the fried hand pies from the oil and place them on a wire rack lined with paper towels to drain excess oil. -
Step 8
While the pies are still warm, whisk together powdered sugar, corn syrup, and water to create a glaze. Drizzle the glaze over the hand pies.
Important Information
Nutrition Facts (Per Serving)
It is important to consider this information as approximate and not to use it as definitive health advice.
Allergy Information
Please check ingredients for potential allergens and consult a health professional if in doubt.