Easy St. Patrick’s Day Cookies – Simple & Fun Recipe
Easy St. Patrick’s Day cookies are the perfect way to add a touch of festive cheer to your celebrations without any fuss. As the emerald isle’s special day approaches, who wouldn’t want a delightful treat that captures the spirit of St. Patrick’s Day? These aren’t just any cookies; they’re a little bite of luck, a sweet symbol of good fortune and a whole lot of fun. What makes these particular Easy St. Patrick’s Day cookies so beloved is their incredible simplicity and versatility. They’re designed for bakers of all levels, meaning even if your kitchen skills are still a work in progress, you can create something truly special. We’re talking minimal ingredients, straightforward steps, and maximum deliciousness. Get ready to impress your friends and family with these charming, easy-to-make cookies that are sure to disappear faster than a pot of gold at the end of a rainbow!
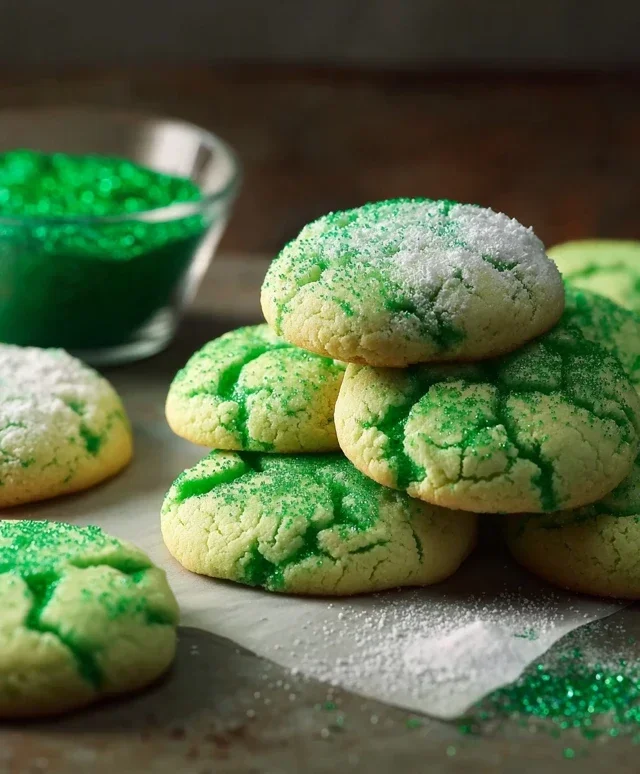
Easy St. Patrick’s Day Cookies
St. Patrick’s Day is a wonderful time for a bit of fun and festivity, and what better way to celebrate than with some cheerful, green cookies? These easy St. Patrick’s Day cookies are incredibly simple to make, perfect for both seasoned bakers and complete begin extractners. They require minimal ingredients, most of which you might already have in your pantry, and the vibrant green color instantly brings the luck of the Irish to your kitchen. Forget complicated doughs and fussy decorations; these cookies are all about quick, delicious, and undeniably festive results. They’re soft, slightly cakey, and have just the right amount of sweetness to be a delightful treat for any St. Patrick’s Day gathering or just a sweet afternoon pick-me-up. Get ready to whip up a batch of pure emerald joy!
Ingredients:
Instructions:
First, let’s get our cookie dough base ready. In a large mixing bowl, combine the contents of your white cake mix. This is the foundation for our delightfully simple cookies. Next, add the 2 large eggs and the 1/3 cup of vegetable oil. These ingredients will help bind everything together and create a wonderfully moist and tender cookie. Now for the magic! Add the 1/4 teaspoon of Kelly green gel food coloring. Gel food coloring is fantastic because it’s highly concentrated, meaning you get a vibrant color without adding extra liquid that could alter the cookie’s texture. Start with a small amount and add more if you desire a deeper green hue. Mix everything together thoroughly until it forms a cohesive dough. You can use an electric mixer for this, starting on a low speed and gradually increasing it, or you can get a good arm workout with a sturdy spoon or spatula. Make sure there are no pockets of dry cake mix left and that the color is evenly distributed throughout the dough. The dough will be quite soft at this stage, almost like a thick batter, and that’s perfectly normal.
Once your green dough is beautifully uniform, it’s time to shape the cookies. This is where the simplicity truly shines. You don’t need to roll out dough or use cookie cutters. Instead, we’ll be making simple drop cookies. Lightly grease a baking sheet or line it with parchment paper. Parchment paper is my preferred method as it prevents sticking and makes cleanup a breeze. Using a small cookie scoop or two spoons, drop rounded tablespoons of dough onto the prepared baking sheet, leaving about 2 inches of space between each cookie. They will spread slightly as they bake, so giving them room is important to prevent them from mergin extractg into one giant green cookie- a happy accident for some, perhaps, but less ideal for individual treats! If the dough is a little sticky, you can lightly flour your hands or the scoop, but be careful not to add too much flour. The texture of this dough is meant to be soft and cake-like.
Now, let’s get these emerald gems into the oven. Preheat your oven to 350 degrees Fahrenheit (175 degrees Celsius). This is a standard baking temperature that works well for most cookies. Once the oven is preheated, carefully place the baking sheet into the center rack. Bake for approximately 8 to 10 minutes. The baking time can vary slightly depending on your oven, so keep a close eye on them after 7 minutes. You’re looking for the edges of the cookies to be lightly golden and set, but the centers should still look slightly soft. Overbaking will result in a dry, crum extractbly cookie, and we definitely don’t want that. The aroma that fills your kitchen during this stage is absolutely delightful!
After the cookies have baked for their allotted time, carefully remove the baking sheet from the oven. Let the cookies cool on the baking sheet for about 5 minutes. This initial cooling period on the hot pan allows them to firm up just enough so they don’t fall apart when you move them. Trying to move them too soon can lead to heartbreak and broken cookies! Once they’ve had a few minutes to settle, use a spatula to gently transfer the cookies to a wire cooling rack to cool completely. This is crucial before we move on to the simple glaze. Rushing this step will result in a melted, messy glaze. Patience is key here, but the wait is well worth it for the perfect finishing touch.
While the cookies are cooling, let’s prepare the simple glaze that adds an extra touch of sweetness and a beautiful finish. In a small bowl, whisk together the 3 tablespoons of granulated sugar and the 6 tablespoons of powdered sugar. The granulated sugar adds a subtle grittiness and sweetness, while the powdered sugar provides the smooth, classic glaze texture. Gradually add a teaspoon of water at a time, whisking continuously, until you achieve a smooth, pourable consistency. You want the glaze to be thick enough to coat the back of a spoon but thin enough to drizzle easily. It should be fluid but not watery. If it’s too thick, add a tiny bit more water. If it’s too thin, add a little more powdered sugar. Once the cookies are completely cool to the touch, you can either drizzle this glaze over the tops using a spoon or a fork, creating a lovely marbled effect, or you can dip the tops of the cookies directly into the glaze for a more opaque finish. For an extra festive touch, you could even add a tiny drop more green food coloring to the glaze to make it a different shade of green! Let the glaze set completely before storing your cheerful St. Patrick’s Day cookies.
Conclusion:
I hope you’ve enjoyed this simple yet delightful recipe for Easy St. Patrick’s Day Cookies! These cookies are a fantastic way to bring a touch of festive cheer to your celebrations without any fuss. Their buttery, melt-in-your-mouth texture combined with the vibrant green icing and playful sprinkles makes them an absolute crowd-pleaser, perfect for both kids and adults. They are remarkably versatile, too. Serve them at your St. Patrick’s Day party, pack them in lunchboxes for a special treat, or simply enjoy one with a warm cup of tea on a cozy afternoon. For a fun twist, consider adding a touch of mint extract to the cookie dough for an extra burst of refreshing flavor, or experiment with different shades of green icing and edible gold coins for an even more dazzling presentation. Don’t be afraid to get creative with your decorations!
So go ahead, gather your ingredients, put on some festive music, and whip up a batch of these Easy St. Patrick’s Day Cookies. They’re guaranteed to bring smiles and a whole lot of green goodness to your day. I can’t wait to hear how yours turn out!
Frequently Asked Questions:
Can I make these cookies ahead of time?
Absolutely! These cookies can be baked a day or two in advance and stored in an airtight container at room temperature. Decorate them just before serving for the freshest look and taste, or if you’re decorating with icing, ensure the icing is fully set before stacking.
What if I don’t have green food coloring?
No problem! You can still enjoy these delicious cookies. The green coloring is purely for aesthetic appeal on St. Patrick’s Day. You could also use yellow food coloring for a “pot of gold” theme, or even leave them plain – they’re wonderful either way!
Are there any nut-free variations?
This recipe is naturally nut-free, assuming you are using nut-free sprinkles. Always double-check the labels of all your ingredients, including your sprinkles and any extracts you might use, to ensure they are safe for everyone you’re baking for.
Easy St. Patrick’s Day Cookies
Simple and festive green cookies perfect for St. Patrick’s Day celebrations, made with cake mix for ease.
Ingredients
-
1 box (15.25 oz) white cake mix (about 3 cups)
-
2 large eggs
-
1/3 cup vegetable oil
-
1/4 teaspoon Kelly green gel food coloring
-
3 tablespoons granulated sugar
-
6 tablespoons powdered sugar
Instructions
-
Step 1
Preheat your oven to 350°F (175°C). Line baking sheets with parchment paper. -
Step 2
In a medium bowl, combine the white cake mix, large eggs, and vegetable oil. -
Step 3
Add the Kelly green gel food coloring and mix until the dough is evenly colored. -
Step 4
Roll the dough into 1-inch balls and then roll each ball in the granulated sugar. -
Step 5
Place the sugar-coated balls about 2 inches apart on the prepared baking sheets. -
Step 6
Bake for 8-10 minutes, or until the edges are lightly golden and the centers are set. -
Step 7
Let the cookies cool on the baking sheets for 2 minutes before transferring them to a wire rack to cool completely. -
Step 8
Once cooled, dust lightly with powdered sugar for an extra festive touch.
Important Information
Nutrition Facts (Per Serving)
It is important to consider this information as approximate and not to use it as definitive health advice.
Allergy Information
Please check ingredients for potential allergens and consult a health professional if in doubt.