Chewy Mango Mochi- Sweet Tropical Dessert Delight
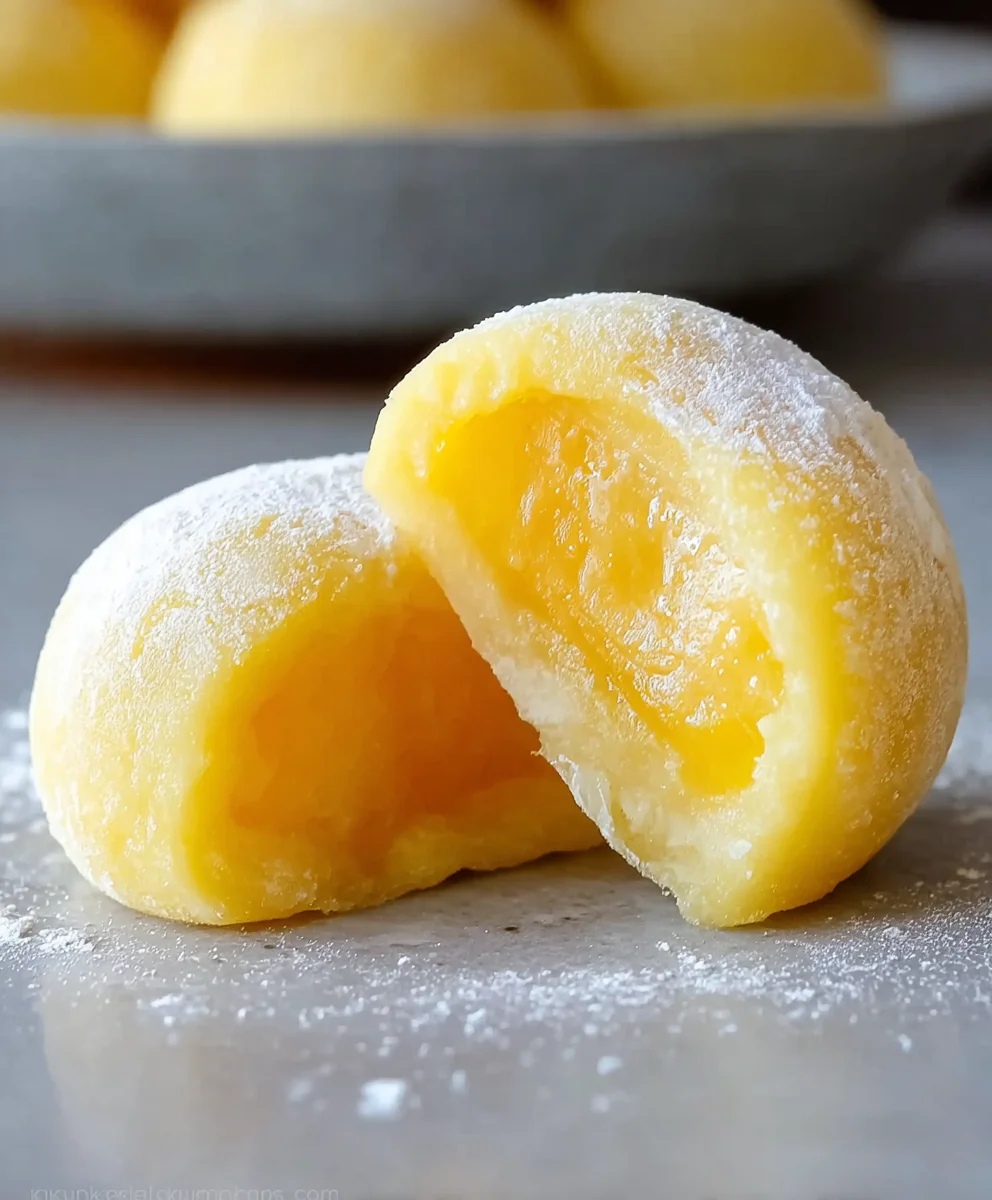
Mango Mochi is more than just a dessert; it’s a delightful adventure for your taste buds and a vibrant celebration of tropical flavors. Imagin extracte the soft, chewy texture of perfectly cooked mochi giving way to a burst of sweet, juicy mango – it’s a combination that has captured hearts worldwide for its unique sensory experience. We love this treat because it offers a satisfying sweetness without being overly heavy, making it the perfect ending to any meal or a delightful pick-me-up any time of day. What truly makes Mango Mochi special is its exquisite balance: the subtle, almost ethereal sweetness of the rice dough perfectly complements the intense, sunny flavor of ripe mango. It’s a dessert that looks as beautiful as it tastes, often featuring the sunny hues of the fruit itself, promising pure, unadulterated joy with every bite. Get ready to embark on creating this truly magical treat.
Ingredients:
- 1 cup glutinous rice flour (also known as sweet rice flour)
- 1/2 cup fresh mango puree (this is simply fresh mango blended until smooth)
- 1/4 cup granulated sugar
- 1 tablespoon neutral cooking oil (like vegetable or canola oil)
- 1/4 cup water
- Cornstarch or potato starch for dusting
Preparing the Mochi Dough
Step 1: Combine Dry Ingredients
First, let’s get our dry ingredients ready. In a medium-sized, microwave-safe bowl, add the glutinous rice flour and the granulated sugar. Whisk these together thoroughly. It’s important to ensure the sugar is evenly distributed throughout the flour to prevent clumps and guarantee a consistent sweetness in your final Mango Mochi. A good whisking now will make the subsequent steps much smoother and the texture of your mochi more refined.
Step 2: Incorporate Wet Ingredients
Next, it’s time to introduce the wet ingredients. Add the fresh mango puree to the bowl with the dry ingredients. Then, pour in the neutral cooking oil and the water. The oil is crucial for adding a slight richness and helping to achieve that characteristic chewy, slightly elastic texture of mochi. Stir everything together with a whisk or a spatula until you have a smooth, lump-free batter. It should have the consistency of a thick pancake batter, with no dry pockets of flour remaining. If you notice any stubborn lumps, don’t hesitate to whisk a little more vigorously or even give it a quick pulse with an immersion blender if you have one, ensuring absolute smoothness.
Cooking the Mochi Dough
Step 3: Microwave the Mochi Dough
Now we’ll cook the mochi dough using the microwave, which is a wonderfully quick and easy method. Cover the bowl loosely with plastic wrap or a microwave-safe lid. Ensure there’s a small gap for steam to escape. Microwave on high power for 1 minute. Carefully remove the bowl from the microwave (it will be hot!). Stir the mixture well with a damp spatula or spoon. You’ll notice it’s already starting to thicken and become more translucent. Return the covered bowl to the microwave and cook for another 1 minute. Again, remove and stir thoroughly. This repeated heating and stirring process is key to developing the sticky, chewy texture of the mochi.
Step 4: Final Microwave Cook and Kneading
We’re almost there with the cooking! After the second microwave session and stirring, cover the bowl once more and microwave for a final 30 seconds to 1 minute, depending on your microwave’s power. The dough should now be completely translucent and have a very sticky, somewhat gelatinous consistency. It will pull away from the sides of the bowl. Once cooked, remove the bowl from the microwave. Now, this is where the magic happens. You need to work the dough while it’s still warm. Lightly grease your hands with a little neutral oil or dust them generously with cornstarch or potato starch. Carefully scrape the hot mochi dough out of the bowl onto a clean, lightly dusted surface. Knead the dough for a minute or two, folding it over on itself. This brief kneading helps to further develop its elasticity and smooth out any remaining inconsistencies. Be patient, as it will be very sticky at this stage.
Shaping and Finishing the Mango Mochi
Step 5: Shaping and Dusting
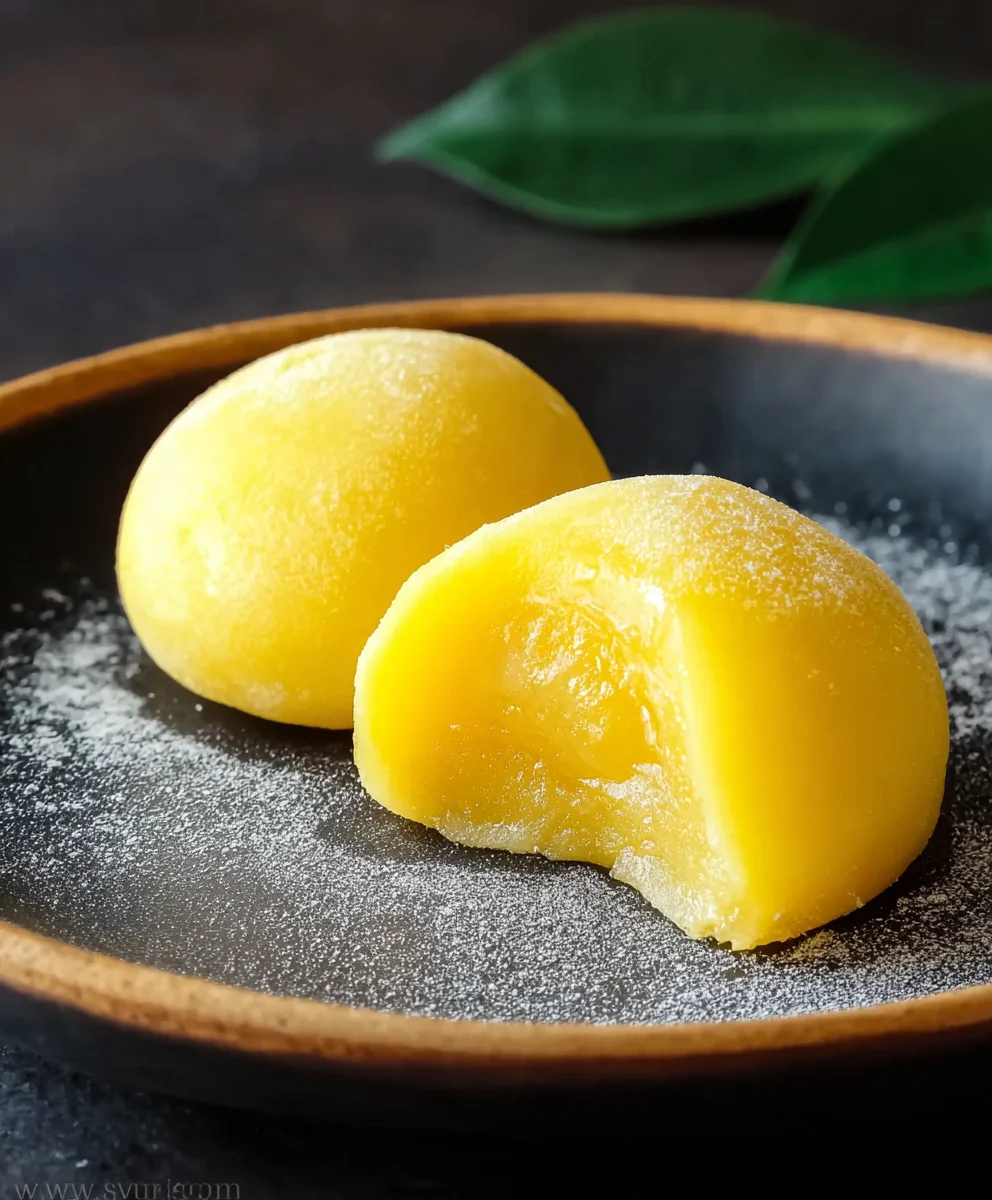
This is the final, fun part where your Mango Mochi takes its recognizable form. Generously dust your work surface with cornstarch or potato starch to prevent sticking. You can also dust your hands again if needed. Take a portion of the mochi dough and flatten it slightly with your fingers. Aim for a thickness of about 1/4 to 1/2 inch. You can either cut the flattened dough into squares using a knife or pizza cutter, or you can pinch off small pieces and roll them into little balls. If you are making individual mochi, you can also flatten each piece into a small disc, place a small dollop of fresh mango chunks or a bit more mango puree in the center, and then carefully pinch the edges together to enclose the filling, creating a small, round mochi. After shaping, lightly dust the finished mochi with more cornstarch or potato starch to prevent them from sticking to each other. This dusting is also what gives mochi its characteristic appearance.
Your delicious homemade Mango Mochi is now ready to be enjoyed! These are best eaten fresh, within a day or two, as they can firm up over time. The vibrant mango flavor combined with the unique chewy texture of the mochi makes for a delightful treat.
Conclusion:
We’ve reached the delightful end of our journey making the perfect Mango Mochi! This recipe has hopefully proven that creating these chewy, sweet, and wonderfully fruity treats at home is entirely achievable and incredibly rewarding. The vibrant tropical flavor of the mango, encased in the soft, sticky mochi dough, is simply irresistible. I encourage you to give this recipe a try; the satisfaction of biting into your own homemade Mango Mochi is unparalleled.
For serving suggestions, Mango Mochi is fantastic on its own as a sweet snack or dessert. They also make a beautiful addition to a platter of assorted Asian sweets or as a refreshing accompaniment to a cup of green tea. Don’t be afraid to experiment with variations! You could try adding a touch of coconut milk to the mochi dough for an extra tropical note, or perhaps a sprinkle of finely chopped toasted almonds for a delightful textural contrast.
Remember, the key to successful mochi is patience and a light hand with the glutinous rice flour. Don’t overwork the dough, and ensure it’s cooked through properly. Enjoy the process and savor the delicious results!
Frequently Asked Questions about Mango Mochi:
Q1: My mochi dough is too sticky, what can I do?
A slightly sticky dough is normal for mochi. The best approach is to lightly dust your hands and work surface with cornstarch or potato starch (this is also called katakuriko). Avoid adding too much extra flour directly to the dough, as this can make it tough. Work quickly and try to handle the dough as little as possible once it’s cooked.
Q2: Can I use canned mango puree instead of fresh mango?
Yes, you absolutely can! If using canned mango puree, drain it very well to remove any excess liquid, as this can affect the mochi dough consistency. You might need to slightly adjust the amount of glutinous rice flour if the puree is particularly watery. Fresh mangoes generally offer a brighter, fresher flavor.
Chewy Mango Mochi
A sweet tropical dessert delight featuring a chewy, glutinous rice dough filled with fresh mango.
Ingredients
-
1 cup glutinous rice flour
-
1/2 cup fresh mango puree
-
1/4 cup granulated sugar
-
1 tablespoon neutral cooking oil
-
1/4 cup water
-
Cornstarch or potato starch for dusting
Instructions
-
Step 1
In a medium, microwave-safe bowl, whisk together glutinous rice flour and granulated sugar until evenly combined. -
Step 2
Add fresh mango puree, neutral cooking oil, and water to the bowl. Stir until a smooth, lump-free batter forms, similar to thick pancake batter. -
Step 3
Cover the bowl loosely with plastic wrap or a vented lid. Microwave on high for 1 minute. Carefully remove and stir thoroughly with a damp spatula. The mixture will start to thicken and become more translucent. -
Step 4
Return the covered bowl to the microwave and cook for another 1 minute. Remove and stir again. This process develops the chewy texture. -
Step 5
Microwave for a final 30 seconds to 1 minute until the dough is completely translucent and sticky. It should pull away from the sides of the bowl. -
Step 6
While the dough is still warm, lightly grease your hands with oil or dust with cornstarch. Scrape the dough onto a lightly dusted surface. Knead for 1-2 minutes, folding it over on itself, until elastic. -
Step 7
Generously dust your work surface and hands with cornstarch or potato starch. Flatten portions of the dough to about 1/4 to 1/2 inch thickness. Cut into squares or roll into balls. For filled mochi, flatten discs, add mango filling, and pinch edges closed. -
Step 8
Lightly dust the shaped mochi with more starch to prevent sticking. Enjoy fresh within 1-2 days.
Important Information
Nutrition Facts (Per Serving)
It is important to consider this information as approximate and not to use it as definitive health advice.
Allergy Information
Please check ingredients for potential allergens and consult a health professional if in doubt.