Keto Crunchwrap Recipe Guilt-Free Indulgence
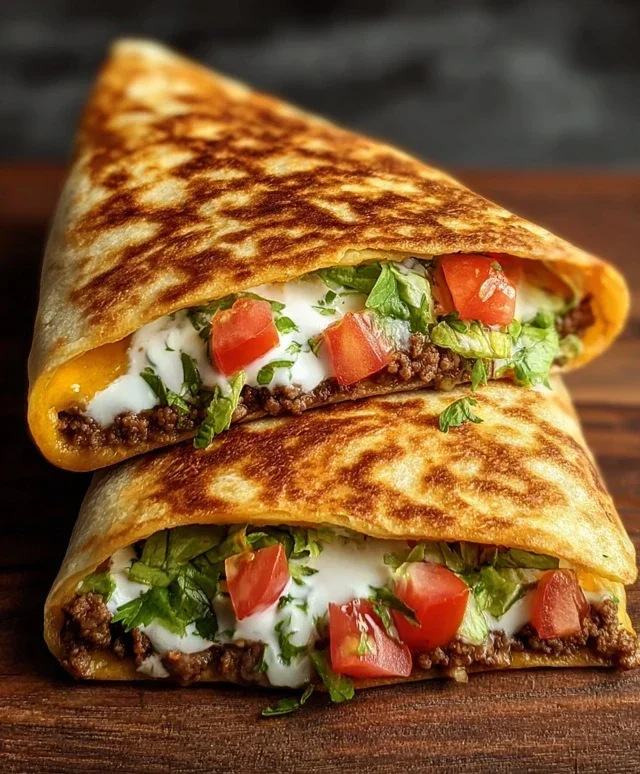
Delicious Keto Crunchwraps Recipe for Guilt-Free Indulgence are about to become your new favorite way to satisfy those cravings! I know, I know, the idea of a “crunchwrap” might conjure up images of carb-loaded fast food. But what if I told you that you can have all the satisfying textures and incredible flavors of a classic crunchwrap, completely keto-friendly and guilt-free? That’s exactly what we’ve created here with this Delicious Keto Crunchwraps Recipe for Guilt-Free Indulgence. People adore crunchwraps because they offer that perfect bite – a little bit soft, a little bit crispy, and bursting with savory goodness. What makes our keto version truly special is how we achieve that signature crunch and satisfying chew without a single grain of flour. Get ready to reimagin extracte your lunch or snack game with a recipe that’s as fun to make as it is to devour!
Delicious Keto Crunchwraps Recipe for Guilt-Free Indulgence
Are you craving that satisfying crunch and savory goodness of a crunchwrap, but trying to stick to your ketogenic lifestyle? Well, get ready to have your taste buds rejoice, because I’ve cracked the code on a truly delicious Keto Crunchwrap that delivers all the indulgence without derailing your macros. These aren’t just a substitute; they’re a revelation! Perfect for a quick lunch, a hearty dinner, or even a satisfying snack, these keto crunchwraps are packed with flavor and that irresistible textural contrast we all love. Say goodbye to carb-heavy wrappers and hello to a guilt-free, satisfying meal that will become a staple in your keto rotation.
Ingredients:
Crafting Your Keto Crunchwrap Masterpiece
The magic of a crunchwrap lies in its layers and the glorious crispiness of the exterior. We’ll achieve this by making a decadent cheese sauce and a perfectly seasoned beef filling, then assembling and pan-frying them to golden perfection.
Step 1: Prepare the Luscious Keto Cheese Sauce
To start, we need to create a rich and creamy cheese sauce that will bind our ingredients and add a wonderful depth of flavor. In a medium saucepan, melt the 2 tablespoons of unsalted butter over medium-low heat. Once melted, whisk in the 4 ounces of cream cheese until it’s smooth and well combined with the butter. This is your base for creaminess. Next, gradually pour in the 1/4 cup of heavy whipping cream, whisking continuously to ensure no lumps form. Continue to cook this mixture, stirring frequently, until it begin extracts to thicken slightly. This usually takes about 3-5 minutes. Don’t let it boil vigorously; a gentle simmer is perfect. Once it has a smooth, pourable consistency that coats the back of a spoon, stir in the 1 cup of shredded cheddar cheese. Keep stirring until all the cheese is melted and the sauce is completely smooth and luscious. Taste and adjust seasoning if needed. Remove from heat and set aside. This sauce is crucial for that gooey, satisfying center. If you’re using coconut cream, you might notice a slightly different texture, but the flavor is still fantastic and keeps this recipe dairy-free friendly.
Step 2: Masterfully Cook the Ground Beef Filling
Now, let’s get to the savory heart of our crunchwraps. Heat the 1 tablespoon of olive oil in a large skillet or frying pan over medium-high heat. Add the 1 pound of ground beef to the hot skillet. Break up the meat with a spoon and cook until it’s thoroughly browned, ensuring no pink remains. This typically takes about 7-10 minutes. Once browned, drain off any excess grease from the skillet. This step is important for a less greasy, more pleasant texture. Now, sprinkle the 2 tablespoons of taco seasoning over the cooked ground beef. Stir well to ensure every piece of meat is coated with the seasoning. Continue to cook for another minute or two, allowing the flavors to meld and the seasoning to become fragrant. If you’re using homemade taco seasoning or a low-sodium variety, you might want to add a pinch of salt and pepper to taste, but generally, the seasoning blend is sufficient. The goal here is a flavorful, well-seasoned ground beef that’s moist but not swimming in grease.
Step 3: Assemble Your Flavorful Layers
This is where the magic of the crunchwrap truly begin extracts to take shape. Lay out your 4 low-carb tortillas on a clean surface. You can slightly warm them in a dry skillet or microwave for a few seconds to make them more pliable and less likely to crack when folding. On one half of each tortilla, spread a generous layer of your prepared keto cheese sauce. Don’t be shy; this is what makes them extra delicious! Next, top the cheese sauce with a portion of your seasoned ground beef. Evenly distribute the beef mixture across the cheese-sauced half of each tortilla. Now comes the fresh element. Layer on some shredded lettuce, chopped tomato (if using), and a sprinkle of cilantro. If you’re adding some heat, this is the perfect time to add your jalapeño slices. Remember, you can customize these fillings to your liking – add some black olives, diced onions, or whatever your keto heart desires!
Step 4: The Crucial Fold and the Extra Cheese Layer
Here’s the technique that makes a crunchwrap a crunchwrap! On the side of the tortilla that doesn’t have any toppings (the empty half), fold it inwards towards the filling, creating a taco-like shape. Then, take the other half of the tortilla that’s loaded with fillings and fold it over the taco-shaped section, tucking it in to create a neat, semi-circular package. It might seem a little tricky at first, but the pliable low-carb tortillas make it manageable. Once you have this folded shape, we’re going to add another layer of deliciousness and structure. Sprinkle a generous amount of the 1 cup of extra cheddar cheese (or your chosen blend, like pepper jack) onto the top of the folded tortilla package. This cheese will act as a glue and create that beautiful, crispy exterior when we cook it. Gently press down on the folded crunchwrap to help it hold its shape.
Step 5: Achieve Golden-Brown Perfection on the Skillet
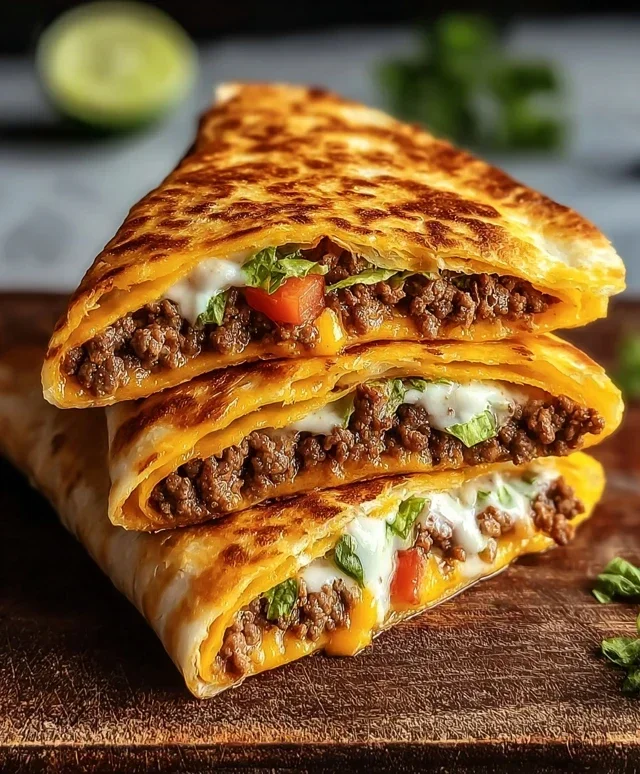
Now it’s time to achieve that signature crunch! Heat a large non-stick skillet or griddle over medium heat. You can add a tiny bit more butter or oil if your skillet isn’t perfectly non-stick, but often it’s not necessary. Carefully place your assembled and cheese-topped crunchwraps into the hot skillet, seam-side down if possible, to help seal them. Cook for 3-5 minutes per side, or until the tortillas are beautifully golden brown and crispy, and the cheese has melted and oozed out slightly to create a delicious crust. You’re looking for that satisfying crunch that signals a perfectly cooked crunchwrap. Use a spatula to gently flip them over to cook the other side. Keep an eye on them to prevent burning; medium heat is key for even cooking. Once both sides are perfectly toasted and the cheese is gooey, remove them from the skillet.
Serve your Keto Crunchwraps immediately while they’re hot and crispy. Accompany them with the 1 cup of sour cream (or Greek yogurt) for dipping, and perhaps some extra salsa or hot sauce if you like. Enjoy every single crunchy, cheesy, savory bite of this guilt-free indulgence! These are truly a game-changer for anyone on a keto diet who misses classic comfort foods.
Conclusion:
There you have it – your ultimate guide to crafting a Delicious Keto Crunchwrap Recipe that’s both satisfying and incredibly low in carbs! This recipe truly delivers on its promise of guilt-free indulgence, offering that irresistible crunch and savory filling without derailing your keto journey. It’s a fantastic option for a quick lunch, a hearty dinner, or even a satisfying snack. The versatility of this crunchwrap is one of its biggest strengths; feel free to customize the fillings to your heart’s content! Think seasoned ground beef, shredded chicken, sautéed mushrooms and onions, or even a vegetarian black bean and cheese option. Serve these delightful crunchwraps warm, perhaps with a side of avocado salsa or a dollop of sour cream for extra richness. I genuinely encourage you to give this recipe a try. You’ll be amazed at how simple it is to create such a flavorful and satisfying keto-friendly meal that truly hits the spot.
Frequently Asked Questions:
What kind of tortillas should I use for the keto crunchwraps?
For the best keto results, I recommend using low-carb tortillas specifically designed for ketogenic diets. You can often find these at specialty grocery stores or online. They are typically made with almond flour, coconut flour, or a blend of fibers to keep the carb count low while still providing a flexible base for your crunchwrap.
Can I make the crunchwraps ahead of time?
While the crunchwraps are best enjoyed fresh for optimal crunch, you can prepare the fillings and assemble them a few hours in advance. To maintain the crispness, I suggest lightly toasting the tortillas before adding the filling and then storing them un-seared. You can then sear them just before serving. For longer storage, keep the fillings separate and assemble just before cooking.
Delicious Keto Crunchwraps Recipe for Guilt-Free Indulgence
Enjoy these delicious and satisfying keto crunchwraps without the guilt. Perfect for a flavorful and low-carb meal or snack.
Ingredients
-
1 tablespoon Olive Oil
-
1 pound Ground Beef
-
2 tablespoons Taco Seasoning
-
2 tablespoons Butter (Unsalted)
-
4 ounces Cream Cheese
-
1/4 cup Heavy Whipping Cream
-
1 cup Shredded Cheddar Cheese
-
4 pieces Low-Carb Tortillas
-
1 cup Sour Cream
-
1 cup Lettuce (Shredded)
-
1 medium Tomato
-
1 cup Extra Cheddar Cheese
-
1/4 cup Cilantro
-
1/2 cup Jalapeño Slices (Optional)
Instructions
-
Step 1
Heat olive oil in a large skillet over medium-high heat. Add ground beef and cook, breaking it up with a spoon, until browned. Drain off any excess grease. -
Step 2
Stir in taco seasoning and cook for 1 minute until fragrant. -
Step 3
In a separate small saucepan, melt butter over medium heat. Add cream cheese and heavy whipping cream, stirring until smooth and melted. Stir in 1 cup of shredded cheddar cheese until melted and creamy. -
Step 4
Lay out the low-carb tortillas. Spread the cheese sauce evenly over the center of each tortilla, leaving a border. Top with the seasoned ground beef. -
Step 5
Add shredded lettuce, diced tomato, extra cheddar cheese, cilantro, and optional jalapeño slices on top of the beef. -
Step 6
Fold in the sides of each tortilla to create a sealed package. Place seam-side down in the same skillet (cleaned) over medium heat. Cook for 3-4 minutes per side, until golden brown and crispy. -
Step 7
Serve immediately with sour cream on the side.
Important Information
Nutrition Facts (Per Serving)
It is important to consider this information as approximate and not to use it as definitive health advice.
Allergy Information
Please check ingredients for potential allergens and consult a health professional if in doubt.