Spinach Feta Quesadillas- Quick Easy Recipe
Spinach and Feta Quesadillas are a weeknight wonder that always hits the spot! There’s just something so inherently satisfying about a perfectly golden-brown tortilla, warmed until it’s wonderfully pliable, cradling a melty, flavorful filling. People flock to this dish because it’s unbelievably simple to whip up, requiring minimal ingredients and even less fuss. It’s the kind of meal that feels both comforting and incredibly fresh, a delightful balance that makes it a perennial favorite for busy families and solo chefs alike.
What makes our Spinach and Feta Quesadillas so special?
It’s the brilliant interplay of textures and tastes! The slightly wilted spinach offers a gentle earthiness, perfectly complemented by the salty, tangy punch of crum extractbled feta cheese. When grilled, the feta melts into pockets of pure bliss, mingling with the spinach to create a harmonious filling that’s utterly addictive. These aren’t just any quesadillas; they’re a testament to how a few simple, quality ingredients can come together to create something truly extraordinary.
Get ready to fall in love with these Spinach and Feta Quesadillas!
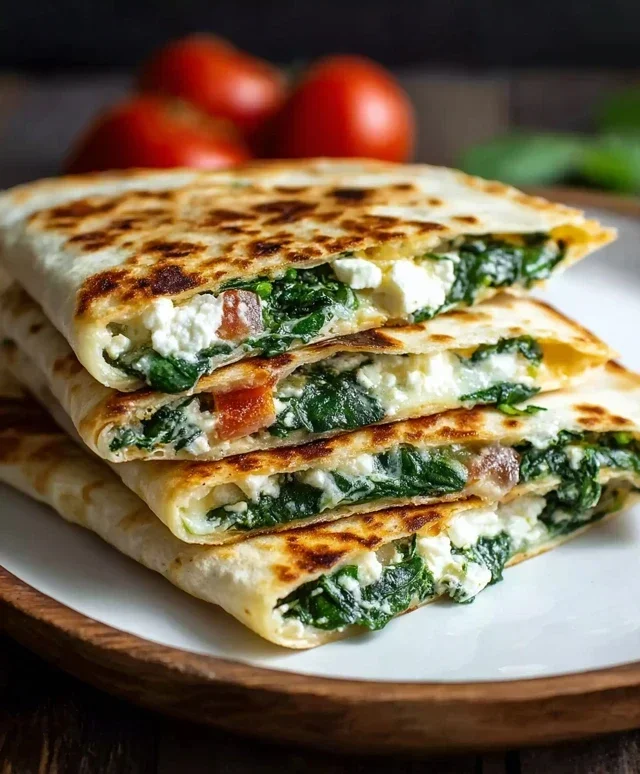
Spinach and Feta Quesadillas
These Spinach and Feta Quesadillas are my go-to for a quick, flavorful, and satisfying meal. They’re incredibly versatile, making them perfect for a light lunch, a hearty appetizer, or even a weeknight dinner when you’re short on time. The salty tang of the feta cheese, combined with the earthy spinach, sweet sun-dried tomatoes, briny olives, and savory chicken, creates a delightful symphony of flavors. Plus, they’re so easy to customize – feel free to swap out ingredients based on what you have in your pantry!
Ingredients:
Cooking Instructions
Let’s get started on these delicious quesadillas! The beauty of this recipe lies in its simplicity and speed. We’ll be working with just a few key components, but the combination is what truly shines.
1. Prepare Your Filling: Before we even think about heating up the pan, it’s important to have your filling ready to go. This ensures that your quesadillas cook evenly and don’t get soggy. Take your 2 cups of fresh spinach and give it a good chop. Don’t worry about making the pieces too small; they’ll wilt down nicely. Next, gather your crum extractbled feta cheese. If you bought a block of feta, crum extractble it yourself for the freshest flavor. Then, chop your 1/4 cup of sun-dried tomatoes. If your sun-dried tomatoes are packed in oil, you can gently pat them dry with a paper towel before chopping. Slice your 1/4 cup of black olives – pre-sliced olives are a great time-saver here. Finally, dice your 1/2 cup of cooked grilled chicken. Leftover grilled chicken or rotisserie chicken works wonderfully for this recipe, adding a nice protein boost and savory depth. In a medium bowl, gently toss together the chopped spinach, crum extractbled feta, chopped sun-dried tomatoes, sliced olives, and diced chicken. This is your delicious filling!
2. Assemble the Quesadillas: Now it’s time to bring it all together. Lay out your 4 tortillas on a clean work surface. For each quesadilla, you’ll want to sprinkle about half of your filling mixture onto one half of a tortilla, leaving a small border around the edges. Try to distribute the ingredients evenly so you get a bit of everything in each bite. Don’t overfill them, or they’ll be difficult to fold and might burst open during cooking. Once you’ve got the filling spread out, fold the other half of the tortilla over the filling, creating a half-moon shape. Gently press down to help it hold its shape. Repeat this process for all four tortillas.
3. Heat Your Pan and Cook the First Side: Place a large non-stick skillet or griddle over medium heat. Add 1 tablespoon of your chosen olive oil or butter to the pan and let it heat up until it shimmers. Carefully place one or two of the assembled quesadillas into the hot skillet. Be careful not to overcrowd the pan, as this will lower the temperature and prevent them from getting nice and crispy. Let the quesadilla cook for about 3-5 minutes on the first side, or until the bottom is golden brown and the cheese is starting to melt. You’ll be able to peek underneath to check for browning.
4. Flip and Cook the Second Side: Once the bottom of your quesadilla is beautifully golden and slightly crisp, it’s time to flip it. Use a wide spatula to carefully lift and flip the quesadilla over. If you’re cooking two at a time, you might want to flip them simultaneously. Add the remaining 1 tablespoon of olive oil or butter to the pan if needed, especially if you’re cooking a second batch. Cook the second side for another 3-5 minutes, or until it’s also golden brown and the cheese is fully melted and gooey. You should see the cheese starting to ooze out slightly from the edges. If your chicken is already cooked and heated through, this is all you’ll need. However, if your chicken was cold to begin extract with, you want to ensure it’s heated through as well during this step.
5. Serve and Enjoy: Once both sides of your quesadillas are perfectly golden and crispy, and the filling is hot and melty, carefully remove them from the skillet. Transfer them to a cutting board. Let them rest for just a minute – this helps the cheese set slightly, making them easier to cut. Using a sharp knife or a pizza cutter, slice each quesadilla into wedges. Serve them immediately while they are warm and wonderfully cheesy. These are fantastic served on their own, or you can elevate them with some of your favorite toppings like salsa, sour cream, guacamole, or a dollop of plain Greek yogurt. The combination of textures and flavors is truly satisfying, and the quick preparation makes them a winner for any occasion. Enjoy your delicious homemade Spinach and Feta Quesadillas!
Conclusion:
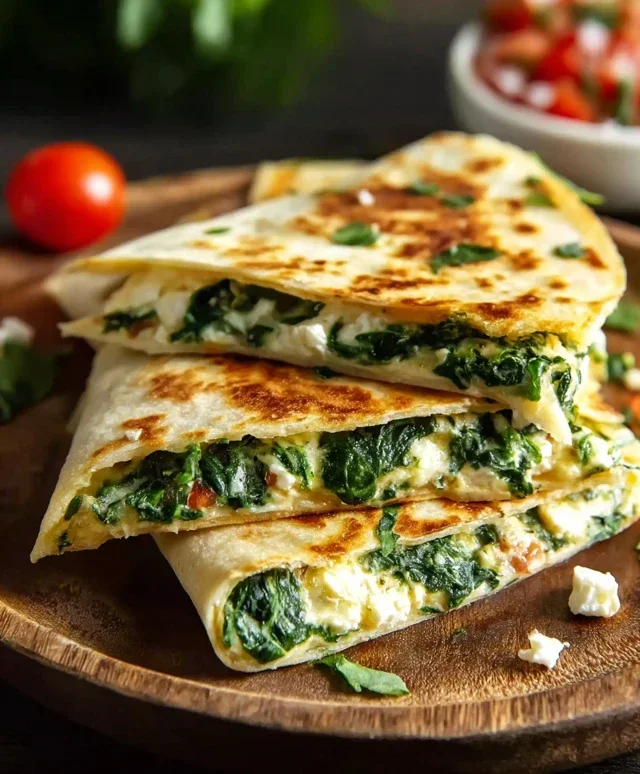
There you have it – your guide to creating delightful Spinach and Feta Quesadillas! I hope you’re as excited to try this recipe as I am about sharing it. This dish truly shines because of its simplicity, speed, and incredible flavor. The combination of tender spinach, salty feta, and melted cheese, all nestled within a crispy tortilla, is a winner every time. It’s a perfect weeknight meal that’s both satisfying and healthy, making it a go-to in my kitchen. I find them incredibly versatile, which is why I’m so enthusiastic about you giving them a whirl!
For serving, I love pairing these quesadillas with a dollop of cool sour cream or Greek yogurt, some fresh salsa, or a vibrant guacamole. They’re also fantastic alongside a simple side salad for a complete and balanced meal. Don’t be afraid to experiment with variations! You could add some sautéed onions or mushrooms, a pinch of red pepper flakes for a little heat, or even some black beans for extra protein. The possibilities are truly endless with this foundation.
So please, dive in and create your own delicious Spinach and Feta Quesadillas. I’m confident you’ll find them as addictive and enjoyable as I do. Happy cooking!
Frequently Asked Questions:
Can I use a different type of cheese?
Absolutely! While feta is key to the classic flavor, you can certainly experiment. Monterey Jack, mozzarella, or a Mexican blend would also melt beautifully and complement the spinach and feta. Just ensure you have enough of that delicious melt factor!
What if I don’t have fresh spinach?
No worries! You can easily substitute with frozen spinach. Just make sure to thaw it completely and squeeze out as much excess water as possible before adding it to the filling. This is crucial to prevent a soggy quesadilla.
Are these good for meal prep?
Yes! You can prepare the spinach and feta filling ahead of time and store it in the refrigerator for up to two days. When you’re ready to eat, simply assemble the quesadillas and cook them fresh for the best texture and taste.
Spinach and Feta Quesadillas
A quick and flavorful quesadilla bursting with fresh spinach, tangy feta, sun-dried tomatoes, olives, and optional grilled chicken.
Ingredients
-
4 medium tortillas (flour, whole wheat, or gluten-free)
-
2 cups fresh spinach (chopped)
-
1 cup feta cheese (crumbled)
-
1/4 cup sun-dried tomatoes (chopped)
-
1/4 cup black olives (sliced)
-
1/2 cup cooked grilled chicken (diced)
-
2 tablespoons olive oil or butter
Instructions
-
Step 1
If using chicken, dice it into small pieces. -
Step 2
In a medium bowl, combine the chopped spinach, crumbled feta cheese, chopped sun-dried tomatoes, sliced black olives, and diced grilled chicken (if using). -
Step 3
Heat 1 tablespoon of olive oil or butter in a large skillet or griddle over medium heat. -
Step 4
Place one tortilla in the skillet. Spread half of the spinach and feta mixture evenly over one half of the tortilla. -
Step 5
Fold the other half of the tortilla over the filling. -
Step 6
Cook for 3-4 minutes per side, until golden brown and the cheese is melted. Remove from skillet. -
Step 7
Repeat with the remaining tortilla and filling, adding more oil or butter to the skillet if needed. -
Step 8
Cut each quesadilla into wedges and serve immediately.
Important Information
Nutrition Facts (Per Serving)
It is important to consider this information as approximate and not to use it as definitive health advice.
Allergy Information
Please check ingredients for potential allergens and consult a health professional if in doubt.